Practice
Let’s continue our discovery of the various DIY videography tools by learning everything you need to know about filming yourself during your DIY sessions, the steps to follow when preparing a video, and setting up your videography tools to ensure the quality of your video.
Setting up your tools
As we already saw in the previous sections, we have learned about the tools and the main stages of preparation for filming:
- Your smartphone, with its video mode
- A tripod (or makeshift tripod)/handheld to ensure a stable, fixed image
- A script for each step you have written in the previous sections
We’ll now be able to discover and prepare for the filming process itself, thinking about how to spin our sustainable practice in its natural setting.
Get ready to film in the shooting environment
Before you start filming, first go through the following checklist:
- Make sure your phone has enough memory to save the videos you’re going to make (you can check this in the ‘Storage’ section of your smartphone’s Settings).
- Put your phone in flight mode (in the Settings) to avoid any interruptions to your filming by ringing or vibrations from your phone.
- Pay attention to the time of day at which you are going to film your DIY practice: natural light makes for much better-looking videos. Direct light sources such as lamps should be used with care after a preliminary video test, and it’s important to ensure that they don’t create too many shadows or strong contrasts.
- If you are shooting indoors, try to position the subject close to a window, lamp or other light source, but not in front of them, so as to avoid backlighting. This will ensure that the subject is well lit, while guaranteeing the quality of the video.
- If you are filming outdoors, pay particular attention to the overall environment: pay close attention to the light, which changes rapidly, and to outside noise from sources you cannot control (people on location, weather elements, work in the street, etc.). When filming someone or a specific element of the setting, pay close attention to the background: find a location with an interesting background but not too distracting.
- Consider any noise the microphone may pick up on your phone. Close doors or windows if necessary, and minimise any unnecessary background noise.
- Speak loudly and clearly and face the camera when discussing your DIY practice; this will help the microphone pick up your voice well.
To check all these points, and before you start filming your DIY practice, you can do a little test: put yourself in the frame, say a sentence or two the way you intend to speak, and mime some gestures. Then check your test. It may reveal problems with sound, framing, or anything else you can quickly correct.
How to shoot your action
Shooting in portrait mode is the best approach for this type of video, as it is the most useful format for spreading a message on social networks.
The easiest way to film this video is to use the stop-start filming method on your phone. This method allows you to pause the recording temporarily and then resume it a few moments or minutes later. This means you can include all the stages of your sustainable DIY project in a single video, even if what you’re creating requires you to wait several minutes to complete it.
Most smartphones should allow you to use the stop-and-start filming method. You need to start filming your video, pause recording when necessary, and then resume recording.
If your smartphone doesn’t allow you to use the stop-and-start method, you can film several short sections, and we’ll see how to put them together later in this module.
Stop-start filming method on Android:
- Start your video by pressing the Play button on the right (image 1).
- To pause recording, press the Pause button on the right, which will replace the Play button once the video has started (image 2). Then, resume your video using the same Play button.
- To end your video, click the Stop button in the centre (image 3).
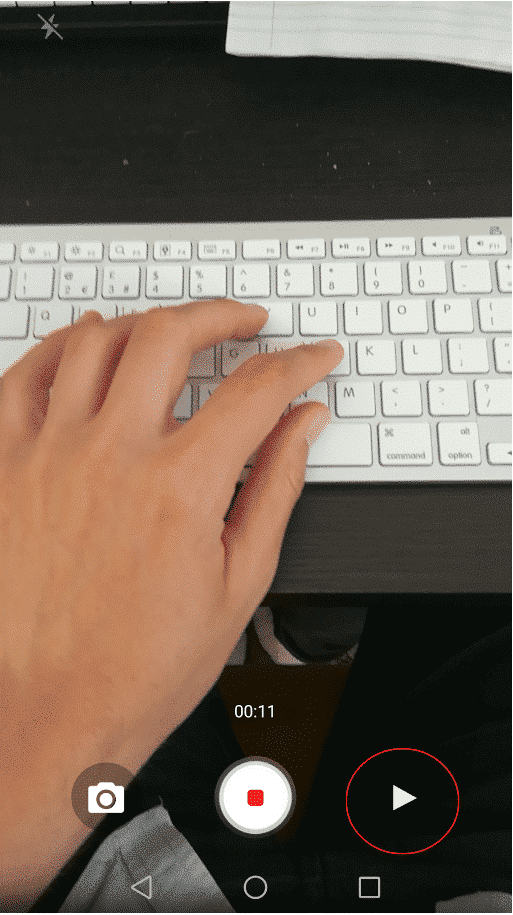
Filming Method on Android
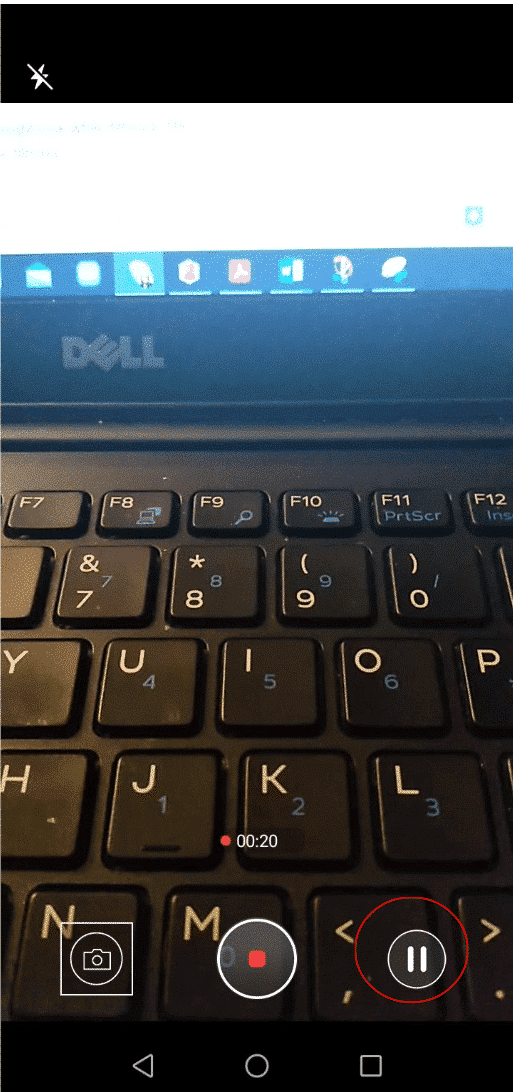
Filming Method on Android
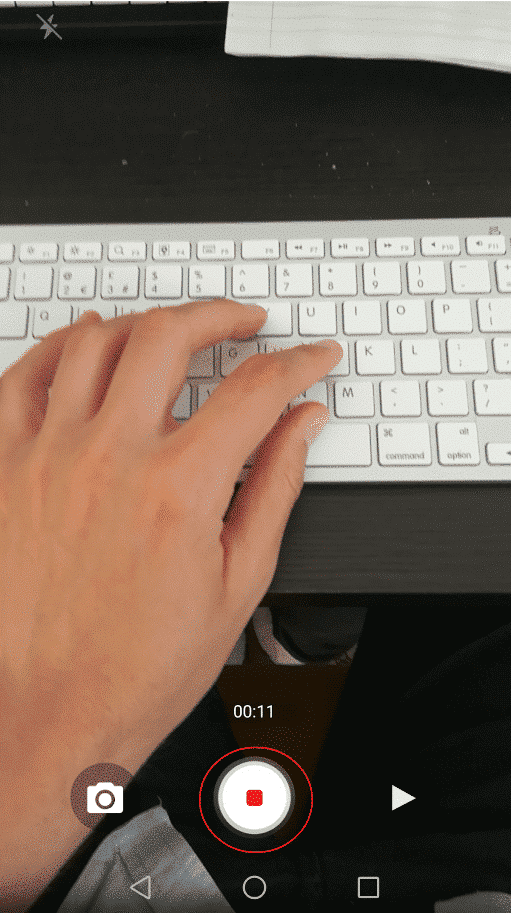
Filming Method on Android
The stop-start function is only available on Android and not on iPhone. For iPhones, you can practise filming everything in a single take, or film small separate takes that you can paste together into a single video in editing software (see the Practice section).
Practical tips and tricks
Here are a few more tips to finish preparing you to film your sustainable DIY practice. These should become increasingly easy for you over time.
- First of all, remember to pay attention to the way you hold your phone if you’re filming without a stand or tripod. This will help you avoid over-straining your arms and wrists, covering the camera with your finger, or distorting the image when you take the shot. To avoid this, pay close attention to your positioning during short test videos, find the ideal position for you, and note the location of the camera on your phone before you start filming so that you don’t place your finger too close to it.
- When filming or preparing a shot, always try to centre the camera’s focus on the main action. Whether it’s a close-up of what you’re doing or a wider shot where you’re presenting your creative environment, centering the action will always make your video more symmetrical and better composed.
How to use the zoom on Android:
You can zoom in and out on Android:
- Pinch with two fingers, either together to zoom in, or apart to zoom out (image 1)
- By clicking on the volume buttons on your Android (image 2): the button for raising the volume zooms the camera in, the button for lowering the volume zooms the camera out. Warning: this method does not work on all Android devices.
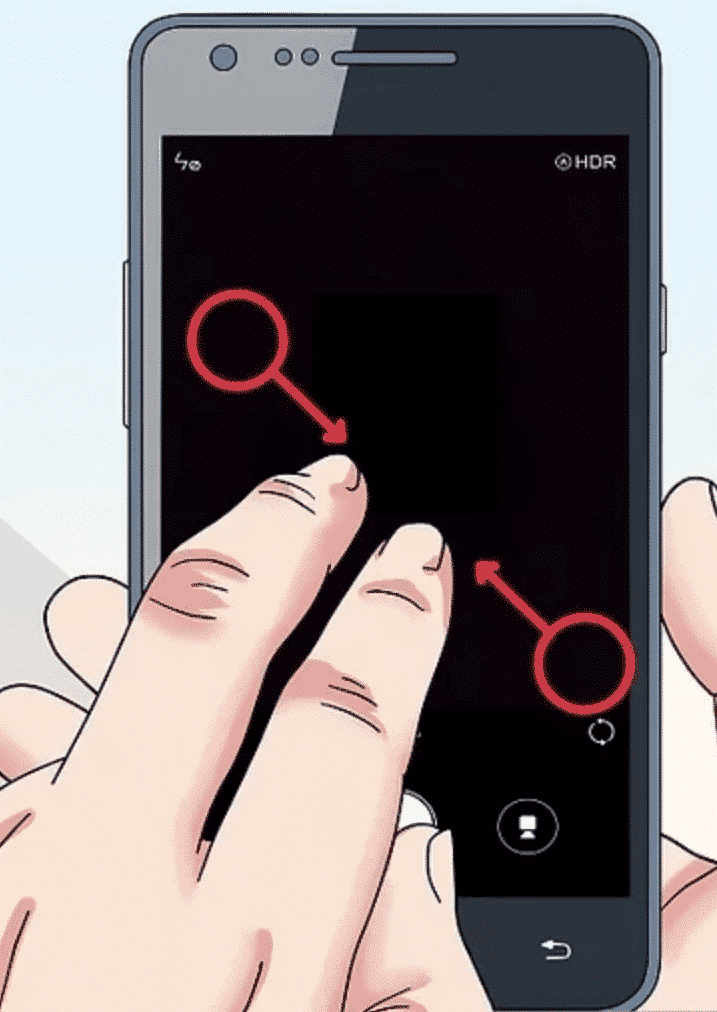
Zoom on Android
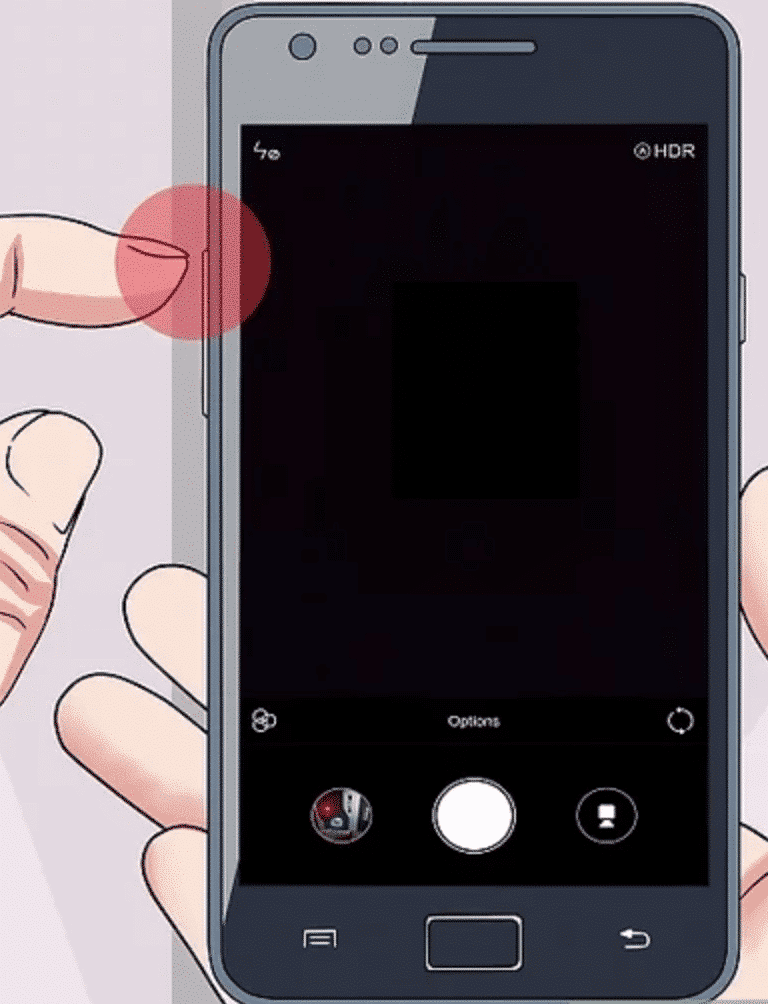
Zoom on Android
How to use the zoom on iPhone:
There are several ways to zoom in on your iPhone:
- Pinch with two fingers on the screen, bringing them together to zoom in or moving them apart to zoom out.
- Click on the preset zoom settings at the bottom of the screen (see the left-hand photo below) to use them.
- For finer zooming in and out, keep your finger pressed down on the preset zoom settings, and you’ll see a thumbwheel appear (see right-hand photo below). Turn it in either direction to choose your zoom setting.
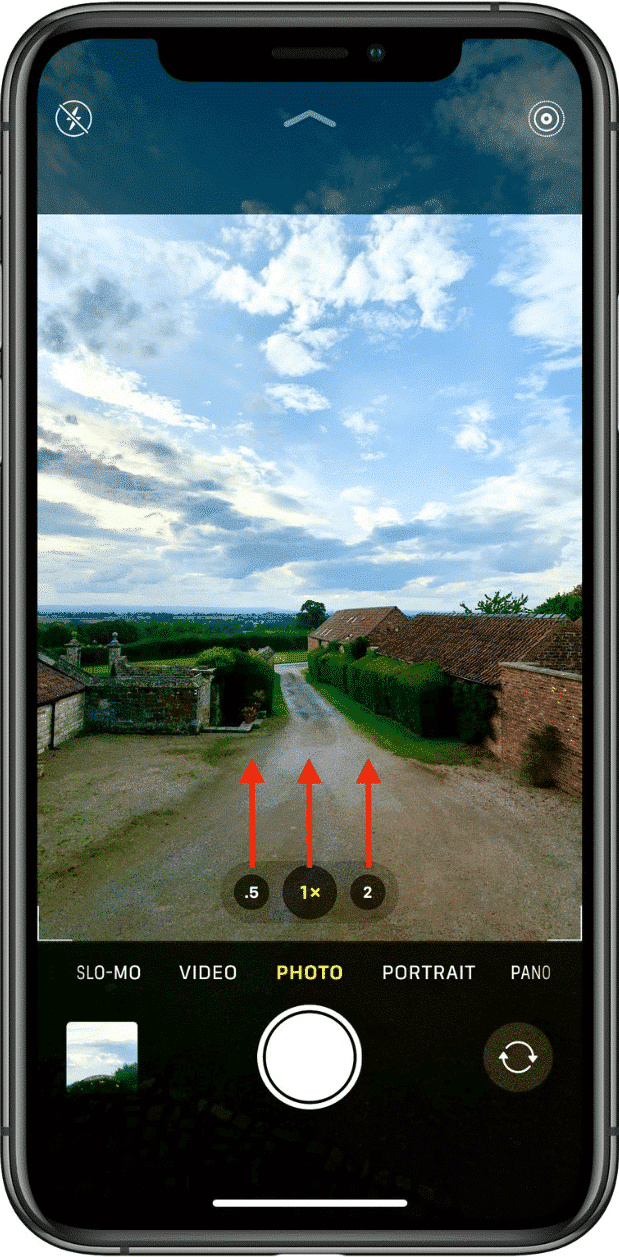
Zoom on iPhone
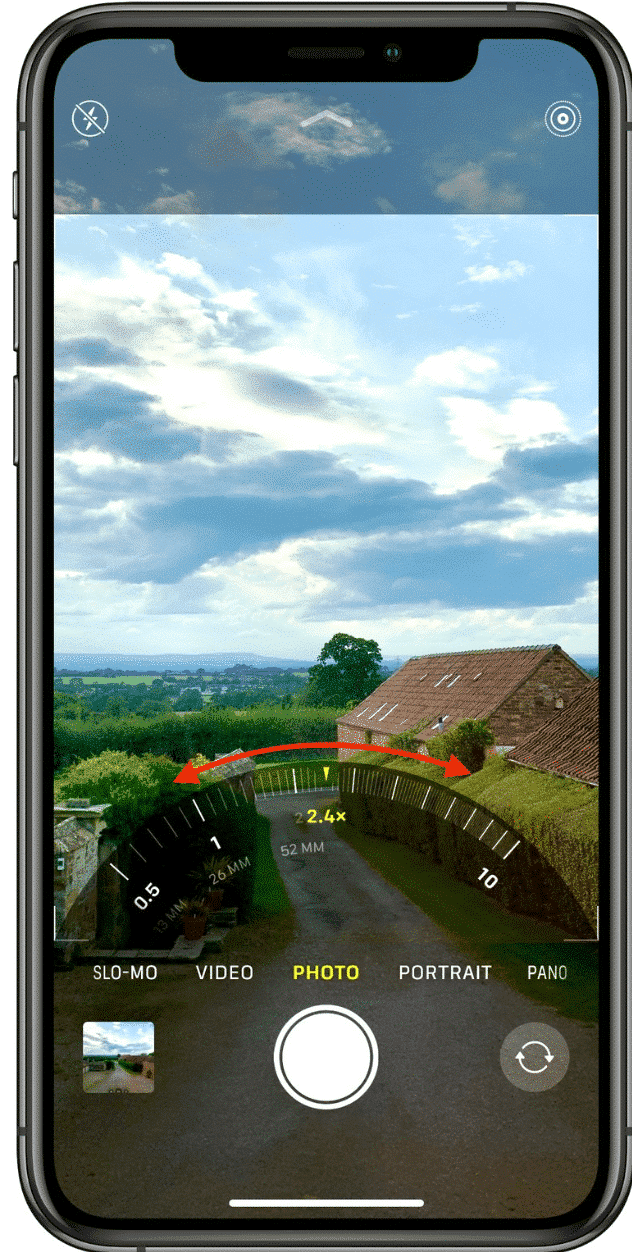
Zoom on iPhone
- On most smartphones, you can display a 3 by 3 grid on the screen of your photos and videos. You can use this to centre your shots, as you can try to ensure that the focal point of what you are filming is placed in the central part of the screen.
How to enable the grid on Android:
- Launch the Camera app icon Camera app
- Tap on Settings icon Settings
- Toggle on Grid lines
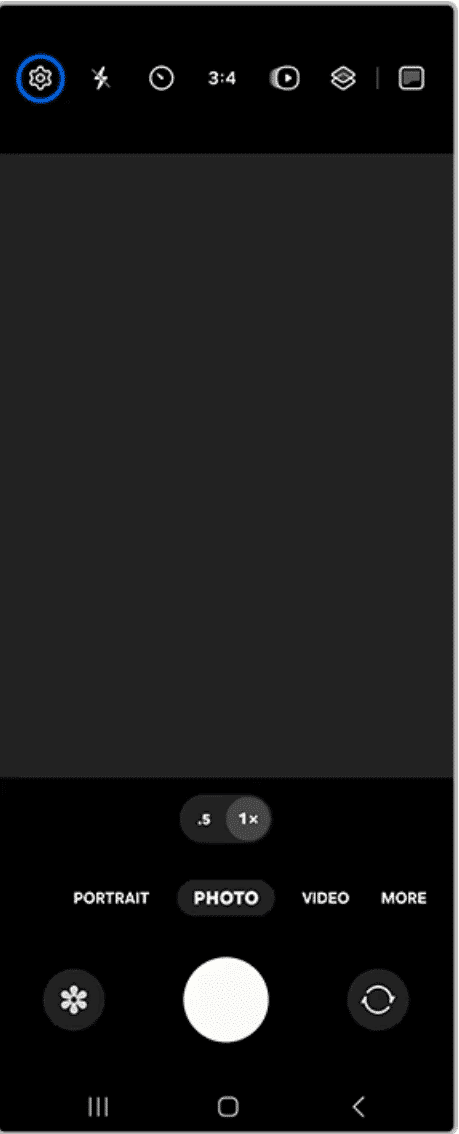
Grid on Android
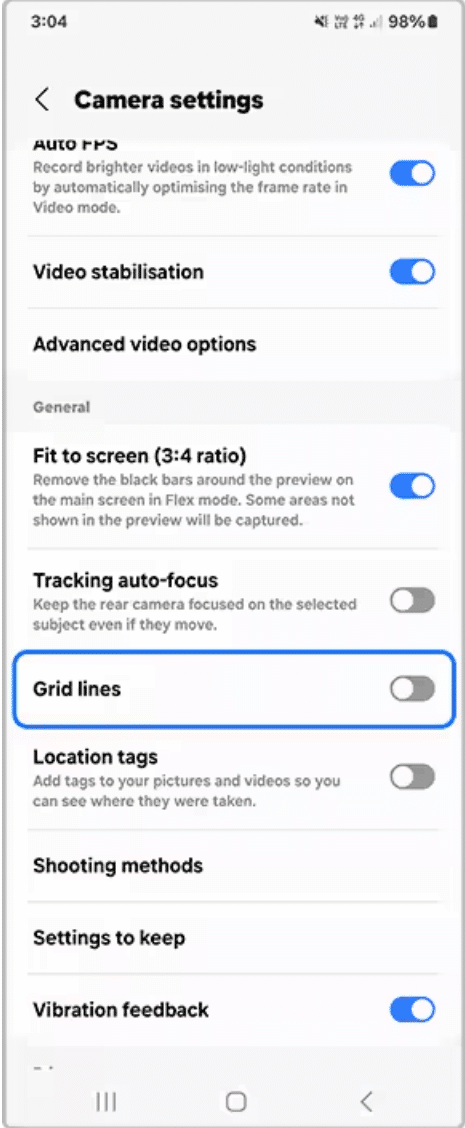
Grid on Android
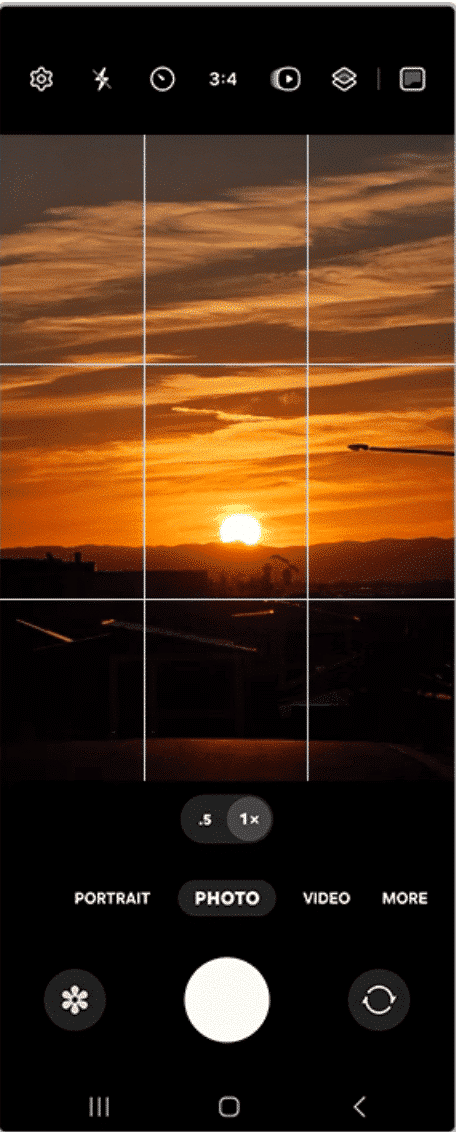
Grid on Android
How to enable the grid on iPhone:
- Open the Settings application and go to the Camera section.
- Under Composition, activate the Grid checkbox.
- Open the Camera application to check whether you can see the grid lines on your screen.
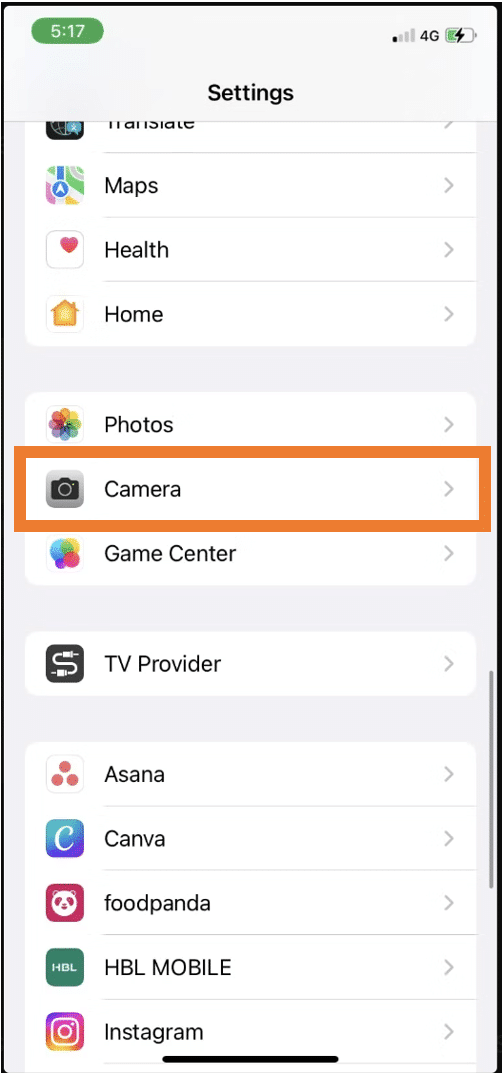
Grid on iPhone
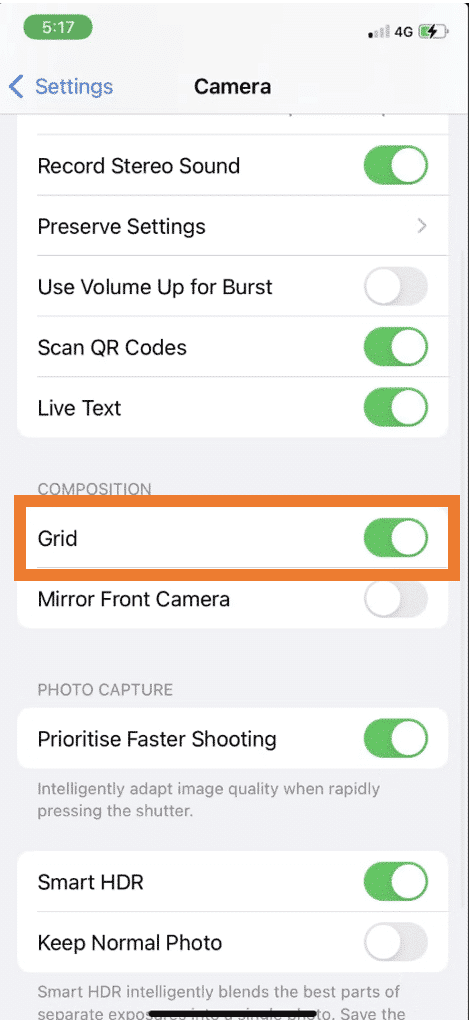
Grid on iPhone
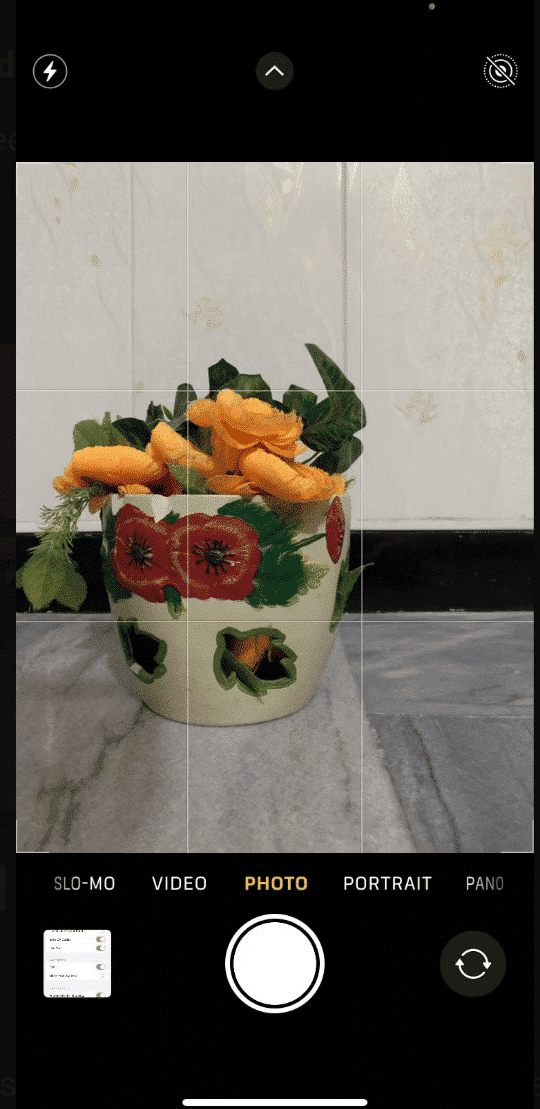
Grid on iPhone
- Finally, with a bit of practice, try combining different types of shots: close-ups, wide shots, panoramic views, zooming in on an action with a narrative voice in the background… You can also study the resources in the “Discover more” section to keep practising and trying out new ways of filming. All this contributes to making a unique video, combining images with an interesting narrative, and mixing freely to create something unique that reflects your vision of a sustainable environment.
Editing
Once you’ve made your film, you can also edit it. To do this, we’re going to present you with several solutions below, as well as links to learn more and go further.
First, let’s review what the native video editors on smartphones can offer you, for some simple video editing. The tools on offer are fairly similar on each type of smartphone, with no one standing out more than another.
- Trimming: You can cut off either a part of the beginning or the end of a video file to reduce its total length and keep only the desired content.
- Basic colour and light adjustments (exposition, luminosity, contrast, saturation, temperature, filters): If you want to change the style of your video, or correct any defects in luminosity during filming, the native editor offers a number of filter and contrast change options.
- Adding text and subtitles: You can add short texts to your videos, choosing their font, colour,position,n and duration in the video, and even add some text animations.
- Adding music: To make a silent video more attractive or liven it up, you can add music and special sound effects, choosing when to add them in the video and for how long.
- Cropping: To refocus viewers’ attention on a particular part of your video, remove unwanted external areas, or change its dimensions (aspect ratio) to adapt it to different social networks, you can use the crop tool, which lets you choose the part of your video that will be visible to your viewers.
More additional features are provided by external apps (for example: InShot, CapCut, Filmora etc.).
- Adding more videos and possibility to adjust each video separately: While this feature is available in the native video editor on Android, it is not available on iPhone. It allows you to paste several videos one after the other, and rework them separately, to create a single, larger video of a quality you’re happy with.
- Changing the order between videos: Changing the order of the short video extracts that make up your main video can be useful if you have forgotten any explanations in the presentation of your DIY, or will help to make your editing dynamic by interspersing explanatory moments with shots presenting your DIY.
- Transitions between videos: To liven up your video and make sure it captures your audience’s attention, you can add transitions between each of your short videos to create a larger one, adding visual, text and sound effects.
- Divide a video into multiple parts: Splitting the video of your DIY activity into several videos can serve several purposes, such as removing less interesting passages from your video, or creating several short pieces of content to present in several instalments on social networks.
A step by step guide for simples editing:
- Choose the video(s) you want to include
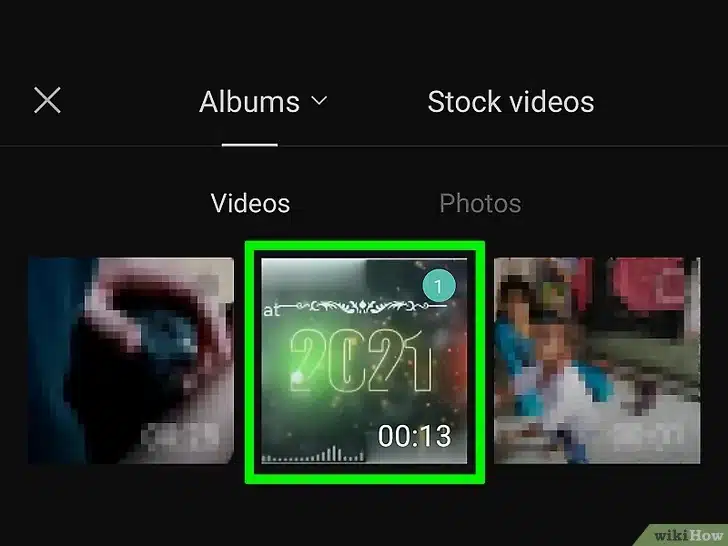
Choose video
2. Adjust the order of the videos (by touching them continuously and dragging them left or right)
3. Adjust the duration of the videos: Trim (by dragging from their side to the center) or Split them
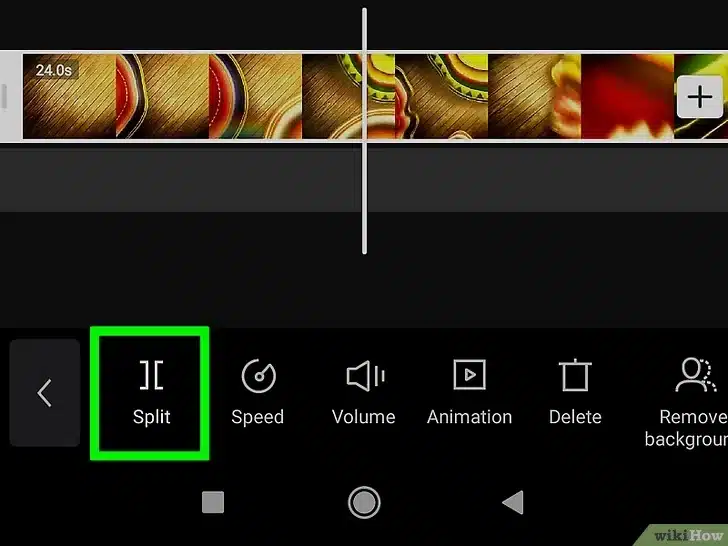
Adjust duration
4. Add Titles/Text
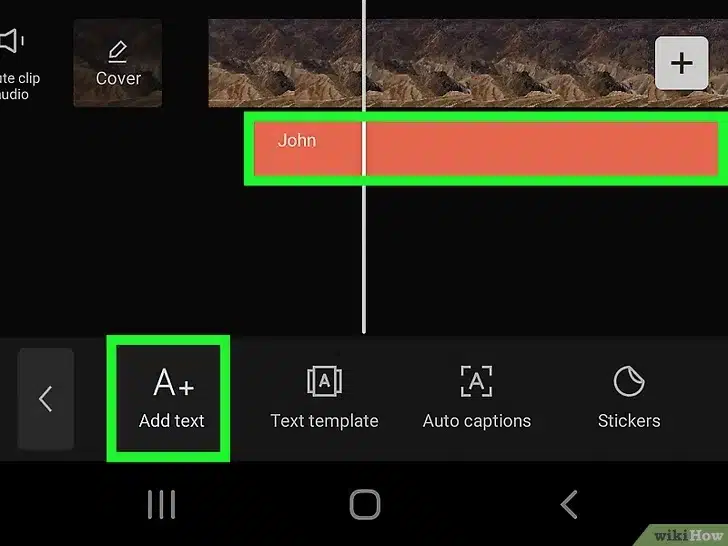
Add titles/text
5. Add Music
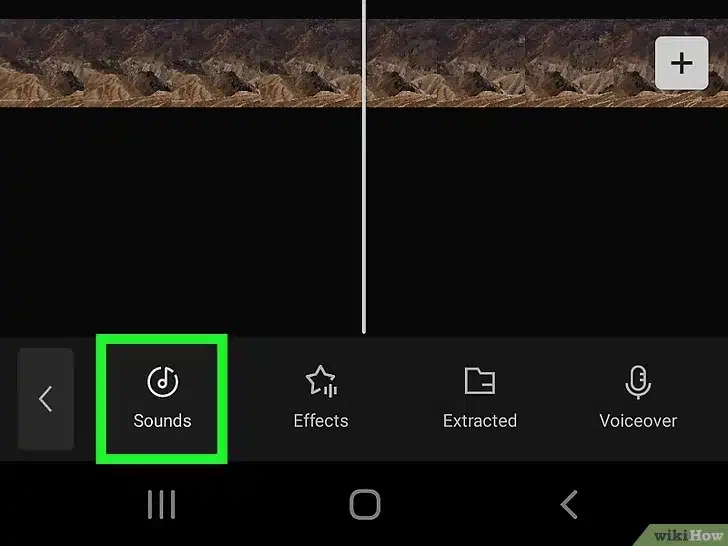
Add music
The screenshots used come from an online source, explaining the use of CapCut, included in the next section. More detailed screenshots/explanations about each step in each of the suggested applications can be found in the following resources!
Additional resources:
For InShot:
For CapCut:
For Filmora:
