
Explore
You now know the sustainable DIY practice you want to realise and show the world. You also know the benefits of this best practice, its history, and its links with your own personal story and interests and with the long or more recent cultural traditions of your region. We have also discovered the world of videography and have a first impression of what we mean by producing, filming, and editing. We are now ready to start planning our videos.
Preparing our tools
- Preparation of tools necessary to carry out the DIY practice we want to film: materials, equipment, etc
- Preparation for filming includes your smartphone, an improvised stand or tripod, courage, and—why not?—good company.
- Preparation of your script-storyboard: A notebook or a paper, pen, and pencil sheet. You can also find the ready-made printable document below.
But how can we create our script and storyboard? To do this, we first have to understand what these terms mean. Then, we will see how we can prepare them together in a single document in an easy way that will help us visualise the transition of our project from paper to action.
Script
The script is a written plan for your video idea. It describes action—what happens—and dialogue—what is said—in each scene of the video. Whether you’re a famous director or a Seniors4Change participant, you will still need a script, not only to give shape to your vision but also to guide you into better organising and preparing for your shooting day(s).
If you choose to include speech in your video, it is a smart idea to read your text out loud many times so that you can modify difficult parts fluidly.
If you choose to make a video without talking, writing spoken dialogue will not be necessary. Matching actions with images will suffice.
Storyboard
So what about planning the images? This is the time to talk about the storyboard, another step towards giving shape to your video. The storyboard allows you to plan filming scene by scene, shot by shot. Its main role is to give a first idea of the shot that you have in mind by drawing it and describing what the drawing represents. For this reason, it consists of a series of squares on a sheet of paper, with a writing space next to each.
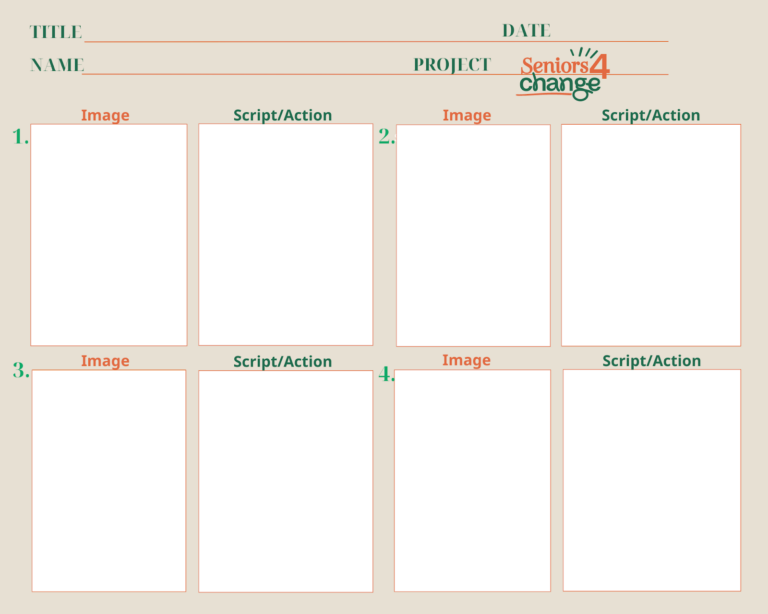
Storyboard creation
To ease our procedure, we suggest including the script in the format of the storyboard. We will, therefore, include our actions and dialogue in the box next to each drawing. You will find just below the link to a printable PDF version of a storyboard template that we suggest, but you can also draw your own version of one on a sheet of paper. Link
Depending on how detailed your storyboard is, you can use either six or eight boxes. You are also free to use as many boxes as you like and to draw or print multiple versions. Of course, you don’t need to be an artist to draw a storyboard. Stick figures and basic shapes are all you need! Each panel describes a camera angle or shot so you know when you need to change focus and so that you remember what happens or is said in every shot. Before we start drawing our storyboard, we need to have some ideas about some important camera shots:
- The establishing shot: This shot is usually used at the very beginning to give an idea of the general setting and position in the story. It often opens a feature film or is used when the plot changes location. It is usually a wide/long shot. This could be a shot of the filming site and tools/equipment from afar.
- Medium shot: The character or object is the focal point, with some background.
- Close-up: The camera zooms in, and the figure or object occupies all the space.
- Extreme close-up: The shot focuses on a character’s face or an important detail of an object.
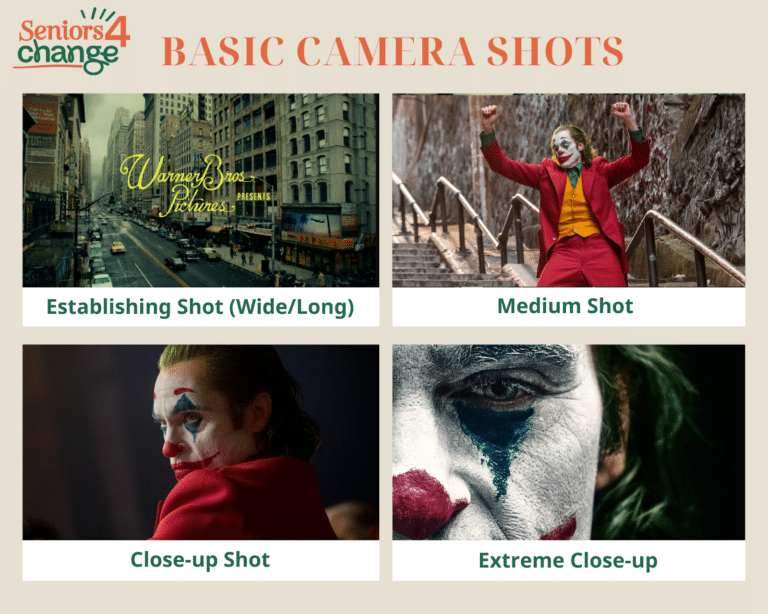
Basic camera shots
But how can we move from theory to practice and complete our storyboard?
To do this, we will facilitate our task by trying to go through our DIY practice once before starting filming. During the preparation and implementation, try to take notes on what you do. Remember! Sometimes, we act automatically without thinking about what exactly we are doing. But our script will have to include this information to help us prepare for filming! For this reason, after finishing this first try, use your notes to create, complete, or correct your script & storyboard.
For every new shot that you identify, draw in a new box. Next to your drawing, write any action that takes place or any text you want to be reading during this shot. An example:
- Establishing shot: the room, filming site or outdoor space from a long distance
- Medium shot: the preparation space/surface with all your tools and equipment
- Close-up: Hands that grab one of the tools to start the action
- Medium shot: Your upper body and hands are in the plan; you look into the camera or combine different tools and materials, etc.
This is an example of how to organise the first shots of your video, and you can imagine many more! Designing your script and storyboard will make the filming procedure much more effortless. If you count on filming with a friend, you can check your finished document before starting to be confident and ready to place your smartphone and start/stop your camera.
Bear this in mind:
- Even if it is an enjoyable exercise, keep in mind that you will afterwards have to do what you now draw. So we suggest that you don’t plan too many shot changes, as it will be harder to accomplish when actually filming.
- Even if all camera shots can be beautiful, the ones that are the most relevant and useful for our type of project are the establishing shot (to start with), the medium shot (for most of the video) and the close-up (for details).
- Even if we will not film during this first try, it’s probably time for us to be sure to know how to find and use our smartphone camera.
Where to find your camera application on Android:
- The appearance of the Camera application on Android varies depending on your smartphone. It is usually represented by a camera or a camera lens.
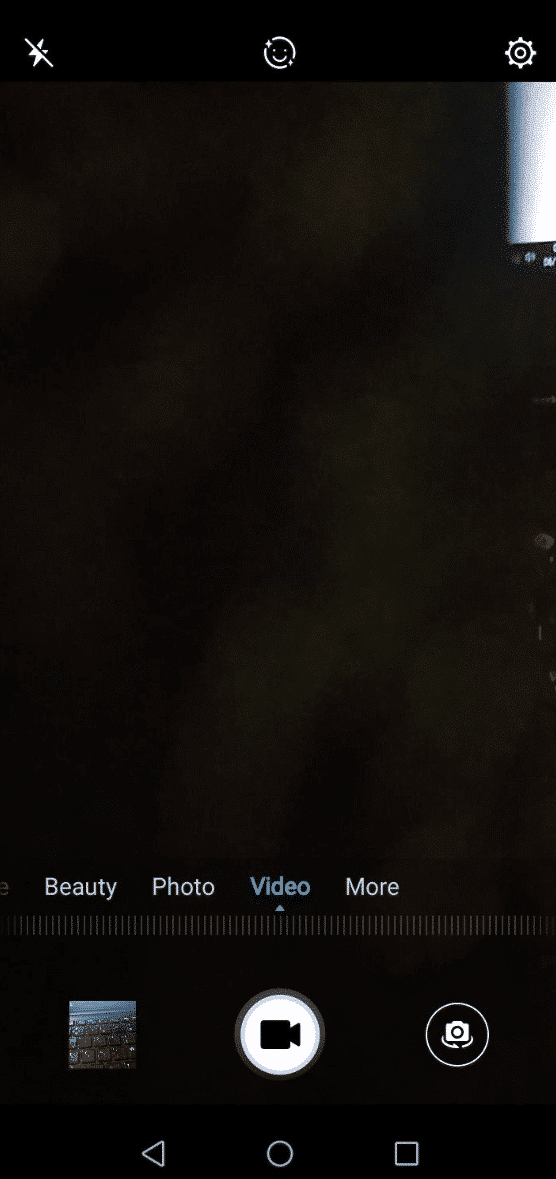
- By default, the application is in Photo mode. To switch from Photo mode to Movie mode, click on Video at the bottom of the screen to the left of Photo.
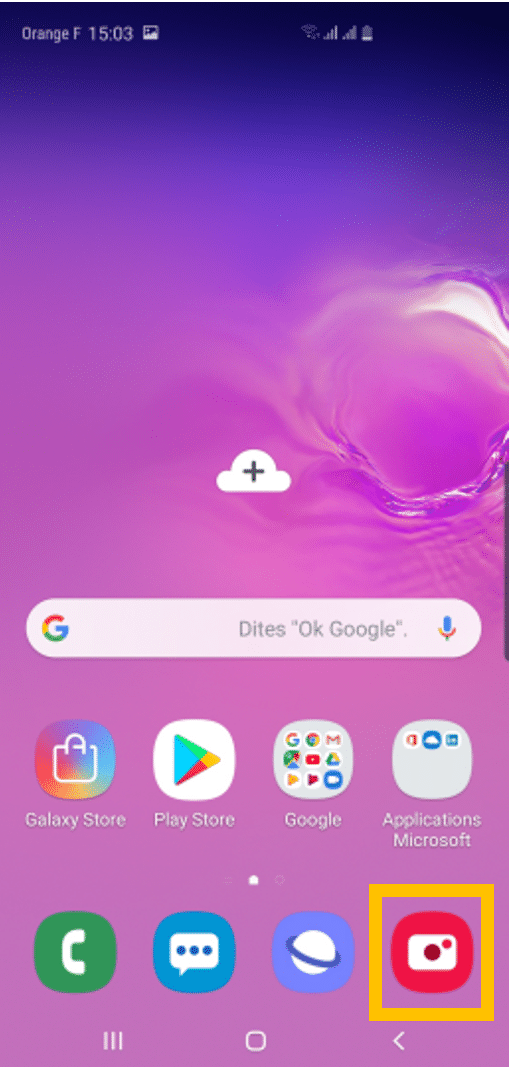
Camera App on Android
Camera App on Android
Where to find your camera application on iPhone:
- The Camera application can be accessed on your smartphone by the icon of a black camera on a grey background.
- By default, the application is in Photo mode. To switch from Photo mode to Movie mode, click on Video at the bottom of the screen to the left of Photo.

Camera App on Iphone
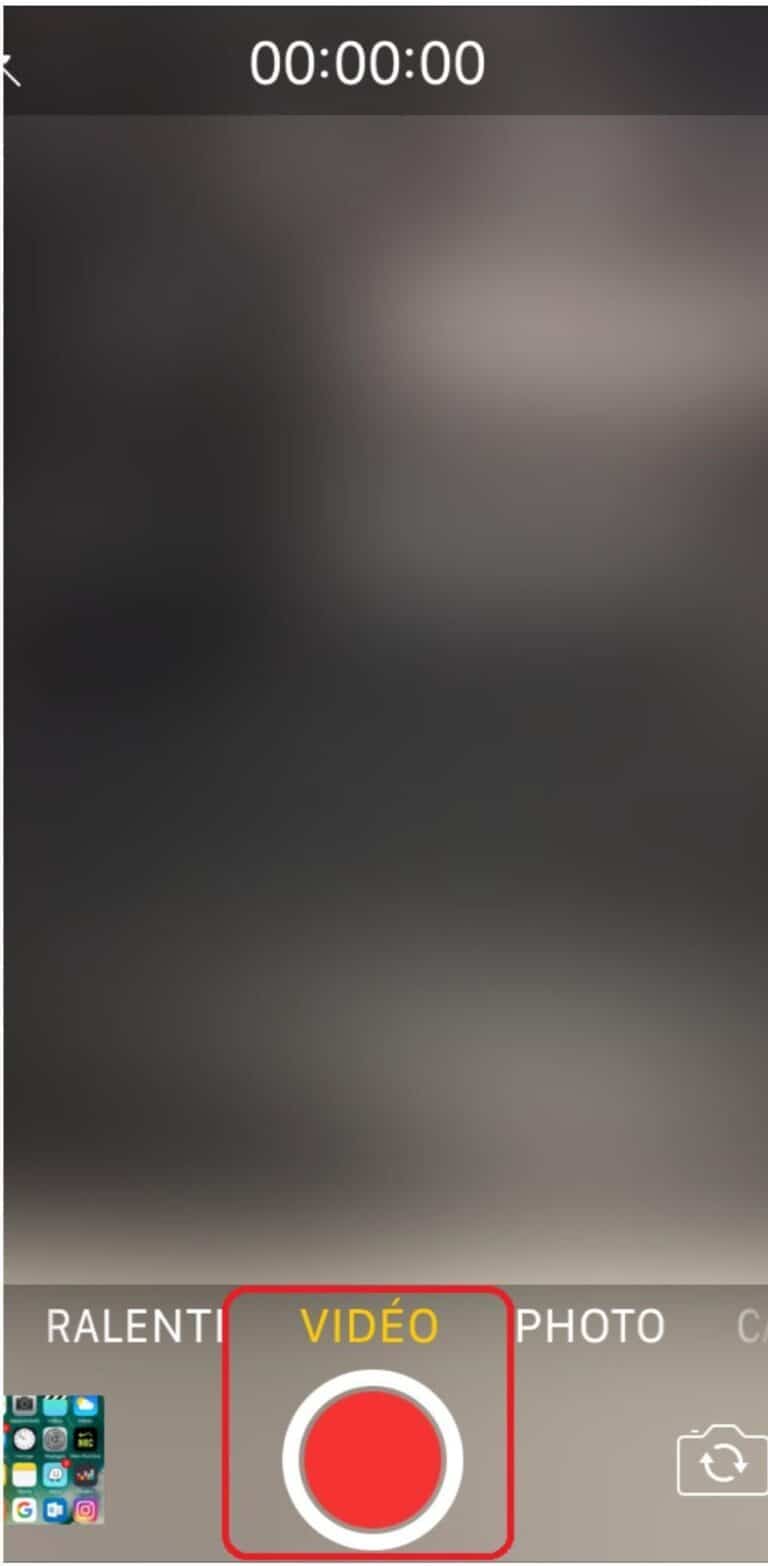
Camera App on Iphone